How to Fix Outlook not Connecting to Your Email Server
Outlook failing to connect to your email server results in an inability to send or receive emails. This often happens due to incorrect server settings (IMAP/SMTP), internet issues, or corrupted Outlook data files. Typically, the main causes are network connectivity problems or incorrect email account settings.
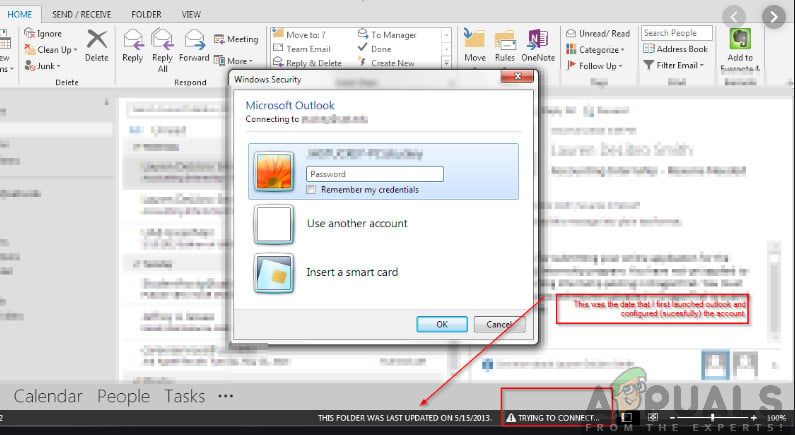
Also, using an outdated version of Outlook, firewall blocks, or problematic add-ins can contribute to this issue.
Now that you know the causes lets discuss the solutions.
1. Power Cycle your Computer
Before trying other solutions, restart your computer and router to clear any error configurations. These devices can occasionally enter error states due to bad updates or unexpected shutdowns. Routers, in particular, often remain in error states until they are power cycled.
Note: Make sure to save your work before proceeding.
- Turn off your computer and router, disconnect the main power supply, and press and hold the power button for 2-3 minutes.

Power Cycling your Computer - Wait 5-8 minutes, plug the power supply back in, and turn on your devices. After the network starts transmitting, try connecting to see if the Outlook issue is resolved.
2. Check Internet Connection
A stable internet connection is essential for Outlook’s communication with email servers. If your network is down or unstable, Outlook cannot send or receive emails, resulting in connection errors. By checking the internet connection, users can determine whether the problem is caused by local network issues.
Before resetting the router, note down its configurations, as these will be lost upon reset. Every ISP saves specific settings on your router. To find your router’s IP address, check the back of the device, its packaging, or search online using the router model. The IP address is often something like ‘192.168.1.2’.
- Find the reset button on the back of your router and press it for about 6 seconds until the router turns off and back on, indicating a reset.
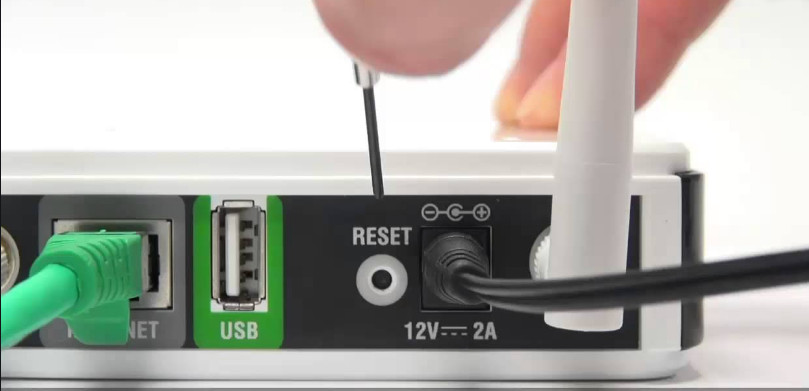
Resetting Router - Re-enter the configurations if necessary, reconnect your console to the network, and check if network initialization issues are resolved.
3. Turn Off Work Offline
Turning off “Work Offline” mode in Outlook helps the app reconnect to your email server. This mode stops Outlook from using the internet, so it can’t send or receive emails. Even if your internet connection is good, Outlook will act offline if this mode is on. Disabling it lets Outlook connect to the server again, fixing any connection problems caused by being offline by mistake.
- Launch Outlook on your computer.
- Now, click on the Send/Receive tab and look for the Work Offline button.

Work Offline Mode – Outlook - If the option is greyed out, it means that the mode is active. Click on it once to deactivate it. Now try connecting and see if the issue is resolved.
4. Check for Updates
Check for available updates for both Outlook and Windows. Typically, Office 365 updates automatically through Microsoft Updates. However, if you’ve postponed or canceled these updates, Outlook may not be on the latest version. Updates often address bugs and introduce new features, so we’ll begin by ensuring both Outlook and Windows are up to date.
4.1. From Outlook App
- Launch Outlook and click the File button at the top-left corner.

File – Outlook - Select Office Account from the left navigation bar, then click Update Options on the right.

Update Options – Outlook - If updates are available, Windows will automatically download and install them.
4.2. From Windows Settings
- Press Windows + S, type “update” in the dialogue box, and open the application.
- In Update settings, click Check for updates and wait for Microsoft to connect to servers.

Checking for Updates – Windows - Any available updates will be downloaded and installed on your computer.
- Restart your computer after updates and check if the issue is resolved.
5. Repair Outlook Account
Incorrect account settings or corrupted data files can disrupt Outlook’s connection to the email server. Outlook’s repair tool scans for inconsistencies and corrects settings like authentication details or synchronization errors, helping to restore the connection. This process prevents the need for manual reconfiguration by aligning your account with the server’s settings.
- Launch Outlook and click the File tab at the top-left corner.
- Select Info, choose your account from the drop-down, then click Account and Social Network Settings and Account Settings.

Account Settings – Outlook - Select the email address with the issue and click the Repair button at the top-left.

Repairing Outlook Account - Enter your details or confirm them. Remove and re-enter the password to ensure it’s correct.

Entering Account Details – Outlook - Press Next. Outlook will attempt to connect to the servers and diagnose any issues.

Outlook repairing account - After the repair, check if the issue is resolved.
6. Disable Extensions
Sometimes, Outlook’s connection problems are caused by third-party extensions. Disabling these add-ins can help identify if they are disrupting the connection between Outlook and the email server. Extensions might conflict with Outlook’s core processes, interrupting email synchronization. By turning them off, you can troubleshoot whether add-ins are blocking the connection and restore Outlook’s normal functionality.
- Launch Outlook and go to File > Options. Click Add-ins from the left navigation bar.
- At the bottom of the right panel, click Go beside Manage.

Add-in settings – Outlook - Uncheck all extensions and click OK.

Disabling Add-in Settings - Restart Outlook and check if the issue is resolved. If resolved, follow the procedure to identify the troublesome add-in.
7. Rebuild Outlook Data File
A corrupted or oversized Outlook data file (PST or OST) can cause connection issues with the email server. Rebuilding the file creates a new, error-free data structure, allowing Outlook to function correctly. This process helps Outlook reconnect using uncorrupted data, reducing synchronization errors and improving performance. It doesn’t delete your emails but ensures the file handling them is clean and error-free.
- Open Outlook and navigate to:
Home/Rules/Manage Rules
then:
Alerts/Options/Export Rules
- Export rules for all your mailboxes to a temporary folder. Use these backups to re-import your rules later.
Now we can proceed with rebuilding your Outlook Data File:
- Go to Account settings as described in Solution 5 for repairing the account.
- Click the Data Files tab, select the problematic email account, and click Open File Location.

Opening Outlook Data File Location - Rename or move the data file to another location.

Outlook Data File - Reopen Outlook. It will try to rebuild your data file automatically. Check if the issue is resolved afterwards.
8. Repair Outlook
If Outlook still doesn’t work, try repairing it with the built-in feature. If that fails, uninstall and reinstall Office 365 from the Microsoft website, using your product key or login credentials. This can fix persistent issues by restoring Outlook to default settings.
Note: In the process of reinstalling, you might be required to have the installation executable with you as well as the product key.
- Press Windows + R, type “appwiz.cpl” in the dialogue box, and press Enter.
- In the application manager, find Microsoft Office, right-click it, and select Change.
- Click Repair and then Continue.

Repairing Outlook - Follow the on-screen instructions, then restart your computer and check Outlook.

